The technology market is full of great products. Some of them worth the price, some not. One is sure – technology developed quickly and now you can choose from thousands of laptops models. But what happens if you decide to create your personal one? I bet that you’ve never heard of a DIY version laptop, right? Well, let me present you one of few tutorials on how to build a laptop on your own, made by DDelectroTech.com
How to build it?
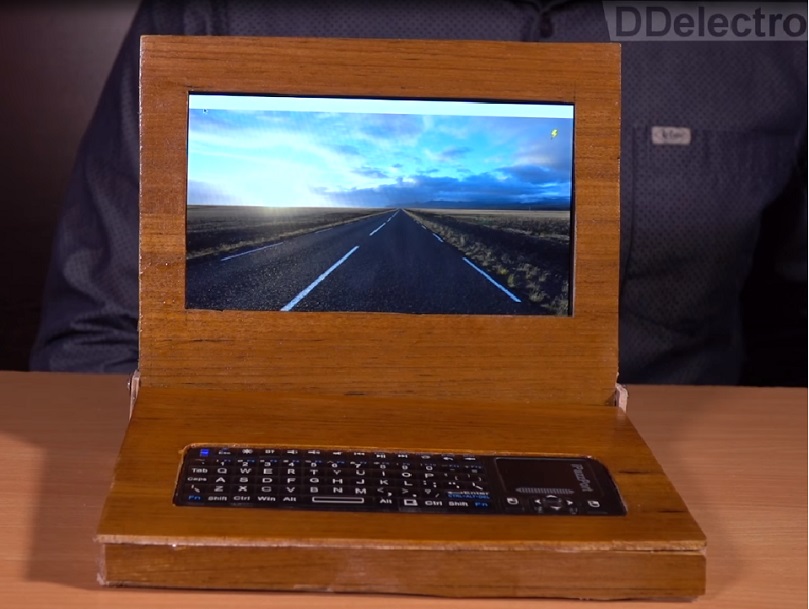
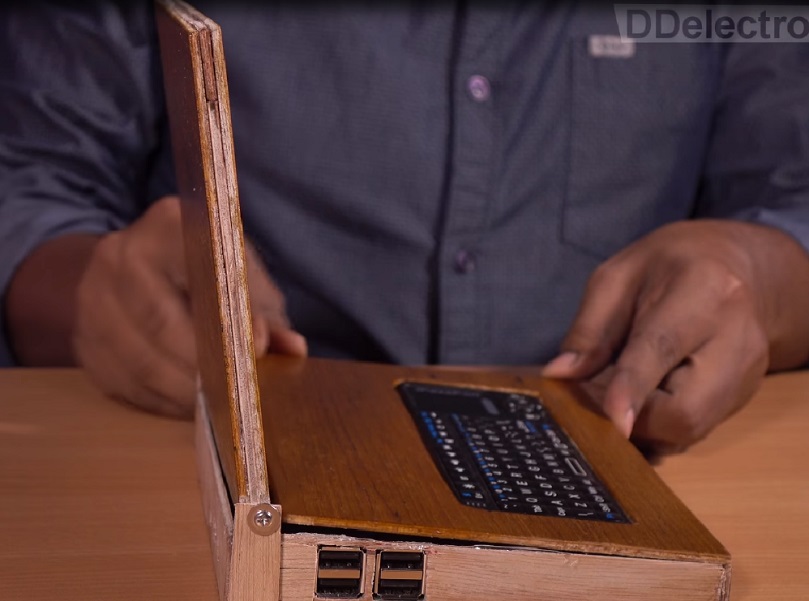
Of course, the laptop does not look like the ones that come from Apple or HP, but at the end of the day you’ll be glad that you’ve created something like this on your own. In the video, the guy uses simple materials for the design. He planned the design on a sheet of paper and then used wood, screws and “primitive” tools for the whole creation of the case. He cut the parts with a jigsaw carefully and easily, as he found out that with a regular saw it would be really hard to do. The parts that you have to cut if you decide to go for it are for the keyboard deck, display and sides. After you cut them, you have to make the edges smooth and prep them with wood finish lacquer for better looks and durability. Don’t forget to make holes for the ports too!
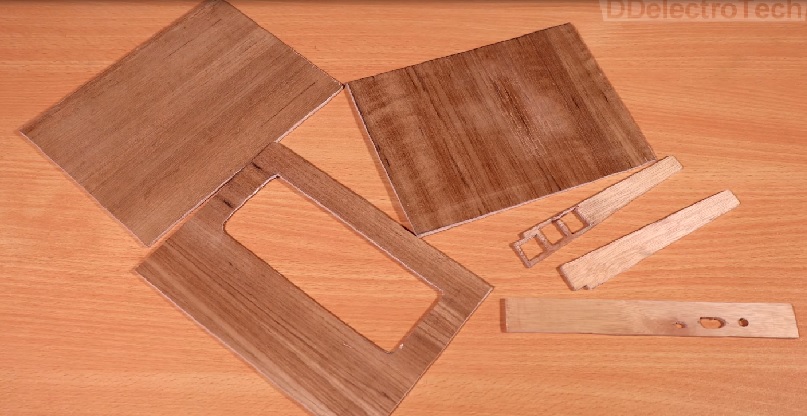
After you’re done with all the cutting and prepping, you have to carefully glue the parts together with wood glue and avoid putting too much as you may get the components glued, which may issue the whole system. The hardware he used is simple and if you are familiar with how to install software, you won’t find the process hard to follow at all.
What components do you need?
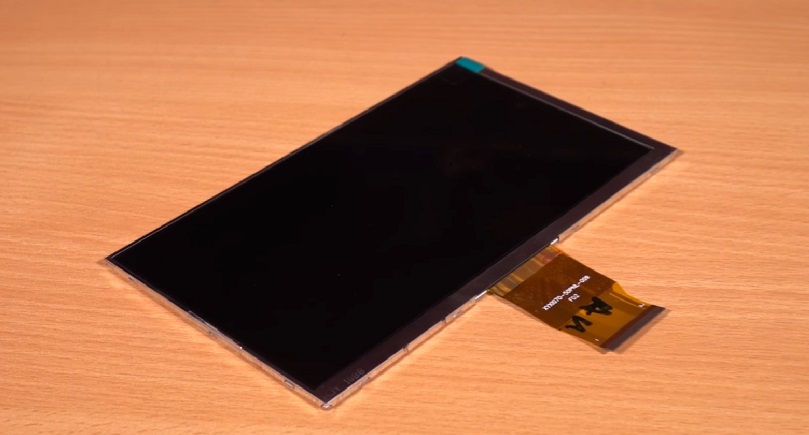
You can’t create a laptop without a display, processor, battery an keyboard. To start, in the video he uses a 7″ IPS HD display with wide viewing angle and color saturation. Once you cut the display frame, all you have to do is slowly put the display between the two panes and carefully glue it. For hinges, he smartly used 2 screws on each side, which I’m not sure how long will last, but the good thing is that the repair will cost you less than a dollar.
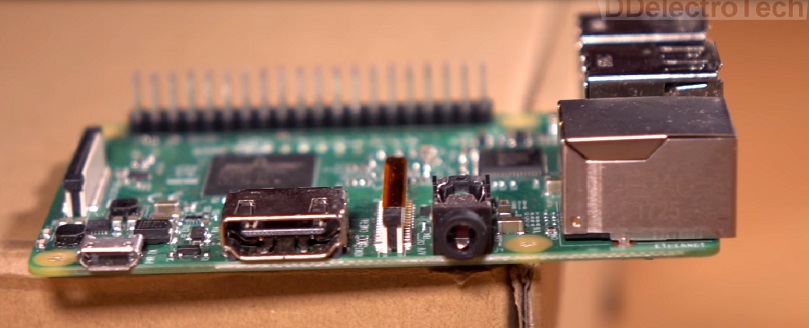
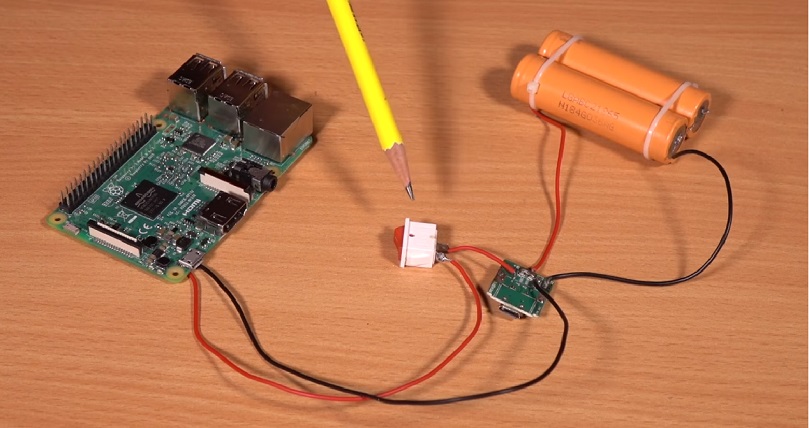
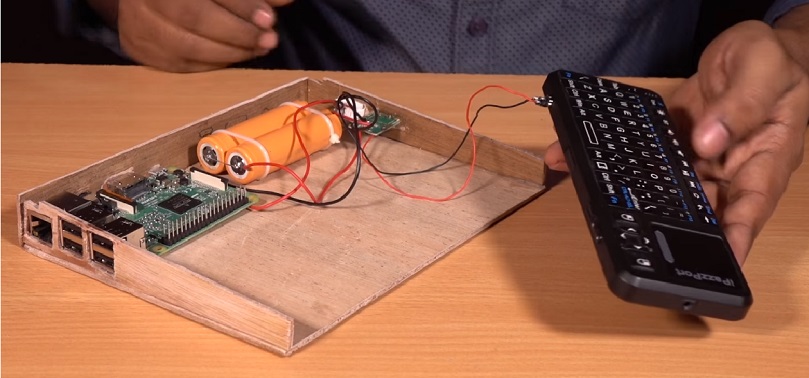
The second important thing that you need is a motherboard. The one that he’s using is a Raspberry Pi 3, which is only $35 unit that has everything you need. It packs a 1.2GHz 64-bit quad-core ARM Cortex-A53 CPU, 1GB of RAM and integrated 802.11n wireless LAN and Bluetooth 4.1 connection. He basically installed the whole OS on a microSD and plugged it into the socket, which caused an initial and easy start-up. The motherboard has four USB ports, one Ethernet, HDMI and 3.5mm audio jack, so you have to carefully cut-out holes for these ports on the sides as well.
Building a machine of this kind brings up another question. How will it be powered? He found a solution to the question by adding a power bank module, that works with 2 lithium-ion batteries that give constant 5-volt output and even added a switch to it. After he connected the power supply with the needed wires for connection, he put the components into the right place in the base of the laptop, under the keyboard. Gluing the components to the side has to be precise, because, again, don’t mess up the components with glue as it may destroy your whole effort!
The last part is finding the right keyboard. In the tutorial, the guy used a wireless keyboard (rechargeable), which is the best option in my opinion as well. He just had to figure out how to keep it constantly connected to a power supply, so he doesn’t have to open up the frame everytime he wants to charge it. He wisely connected the keyboard directly to the power module and then arranged the other parts one by one.
Overall, this DIY version of a laptop is great and will cost you under $100. It works fine and will be the perfect machine that you could use to meet your kid with technology. You would not like your $1000 laptop to get broken and with this non-powerful machine, you will restrict your child from content that you wouldn’t like it to get its hands on.